
OBS guide for streamers
An introduction to OBS Studio using your own camera, microphone and graphics. The menu names below match the English-language official guide.
1. Download OBS from its official site
Open the OBS Studio download page, select your operating system and check its requirements before installing.
2. Prepare the basic settings
Use Tools → Auto-Configuration Wizard as a starting point for your computer and network. Check your camera and microphone. Choose resolution and bitrate for your device and upload connection rather than copying fixed settings from old screenshots.
3. Create a scene in Scenes
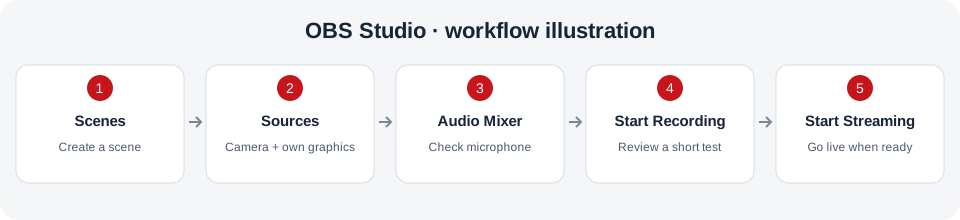
Add a scene and give it a clear name, such as Camera or Commentary. Scenes organize the camera, text and graphics you want to show at each stage of your broadcast.
4. Add your content in Sources
Add Video Capture Device for your camera, and Image or Text for your own graphics and captions. Check their position and size in the preview. Do not add match footage or audio that you do not have permission to use.
5. Check Audio Mixer
Speak into your microphone and check the meter. Select the correct microphone in Settings → Audio and confirm it is unmuted, and keep its level out of the red. Use headphones to reduce feedback and mute sources you do not need.
6. Test with Start Recording
Make a short recording of your voice and scenes. Stop and play the file back to check the picture, sound and any private information accidentally visible before going live.
7. Connect in Settings → Stream
When your account provides broadcast details in the streamer center, enter your own Server and Stream Key in Settings → Stream, selecting Custom when entering a server URL manually. Keep the key private and out of screenshots, posts and chat. Do not use someone else's key if your account has no broadcast details.
8. Start and stop the broadcast
After completing your checks, choose Start Streaming. Check your room's picture and sound on the website. At the end, choose Stop Streaming in OBS and check the room status.
If the picture or sound has a problem
Check the selected devices, enabled sources and upload connection. A local recording helps distinguish scene or audio problems from network problems. Reduce resolution or frame rate if the computer is overloaded, then test again.
For current interface screenshots and details, use the OBS Quick Start Guide and OBS knowledge base. Menus may differ by operating system and version.